Stop Squinting or Fumbling for Your Glasses: Zoom Magnification on Apple Devices
Stop Squinting or Fumbling for Your Glasses: Zoom Magnification on Apple Devices
Take control of Zoom
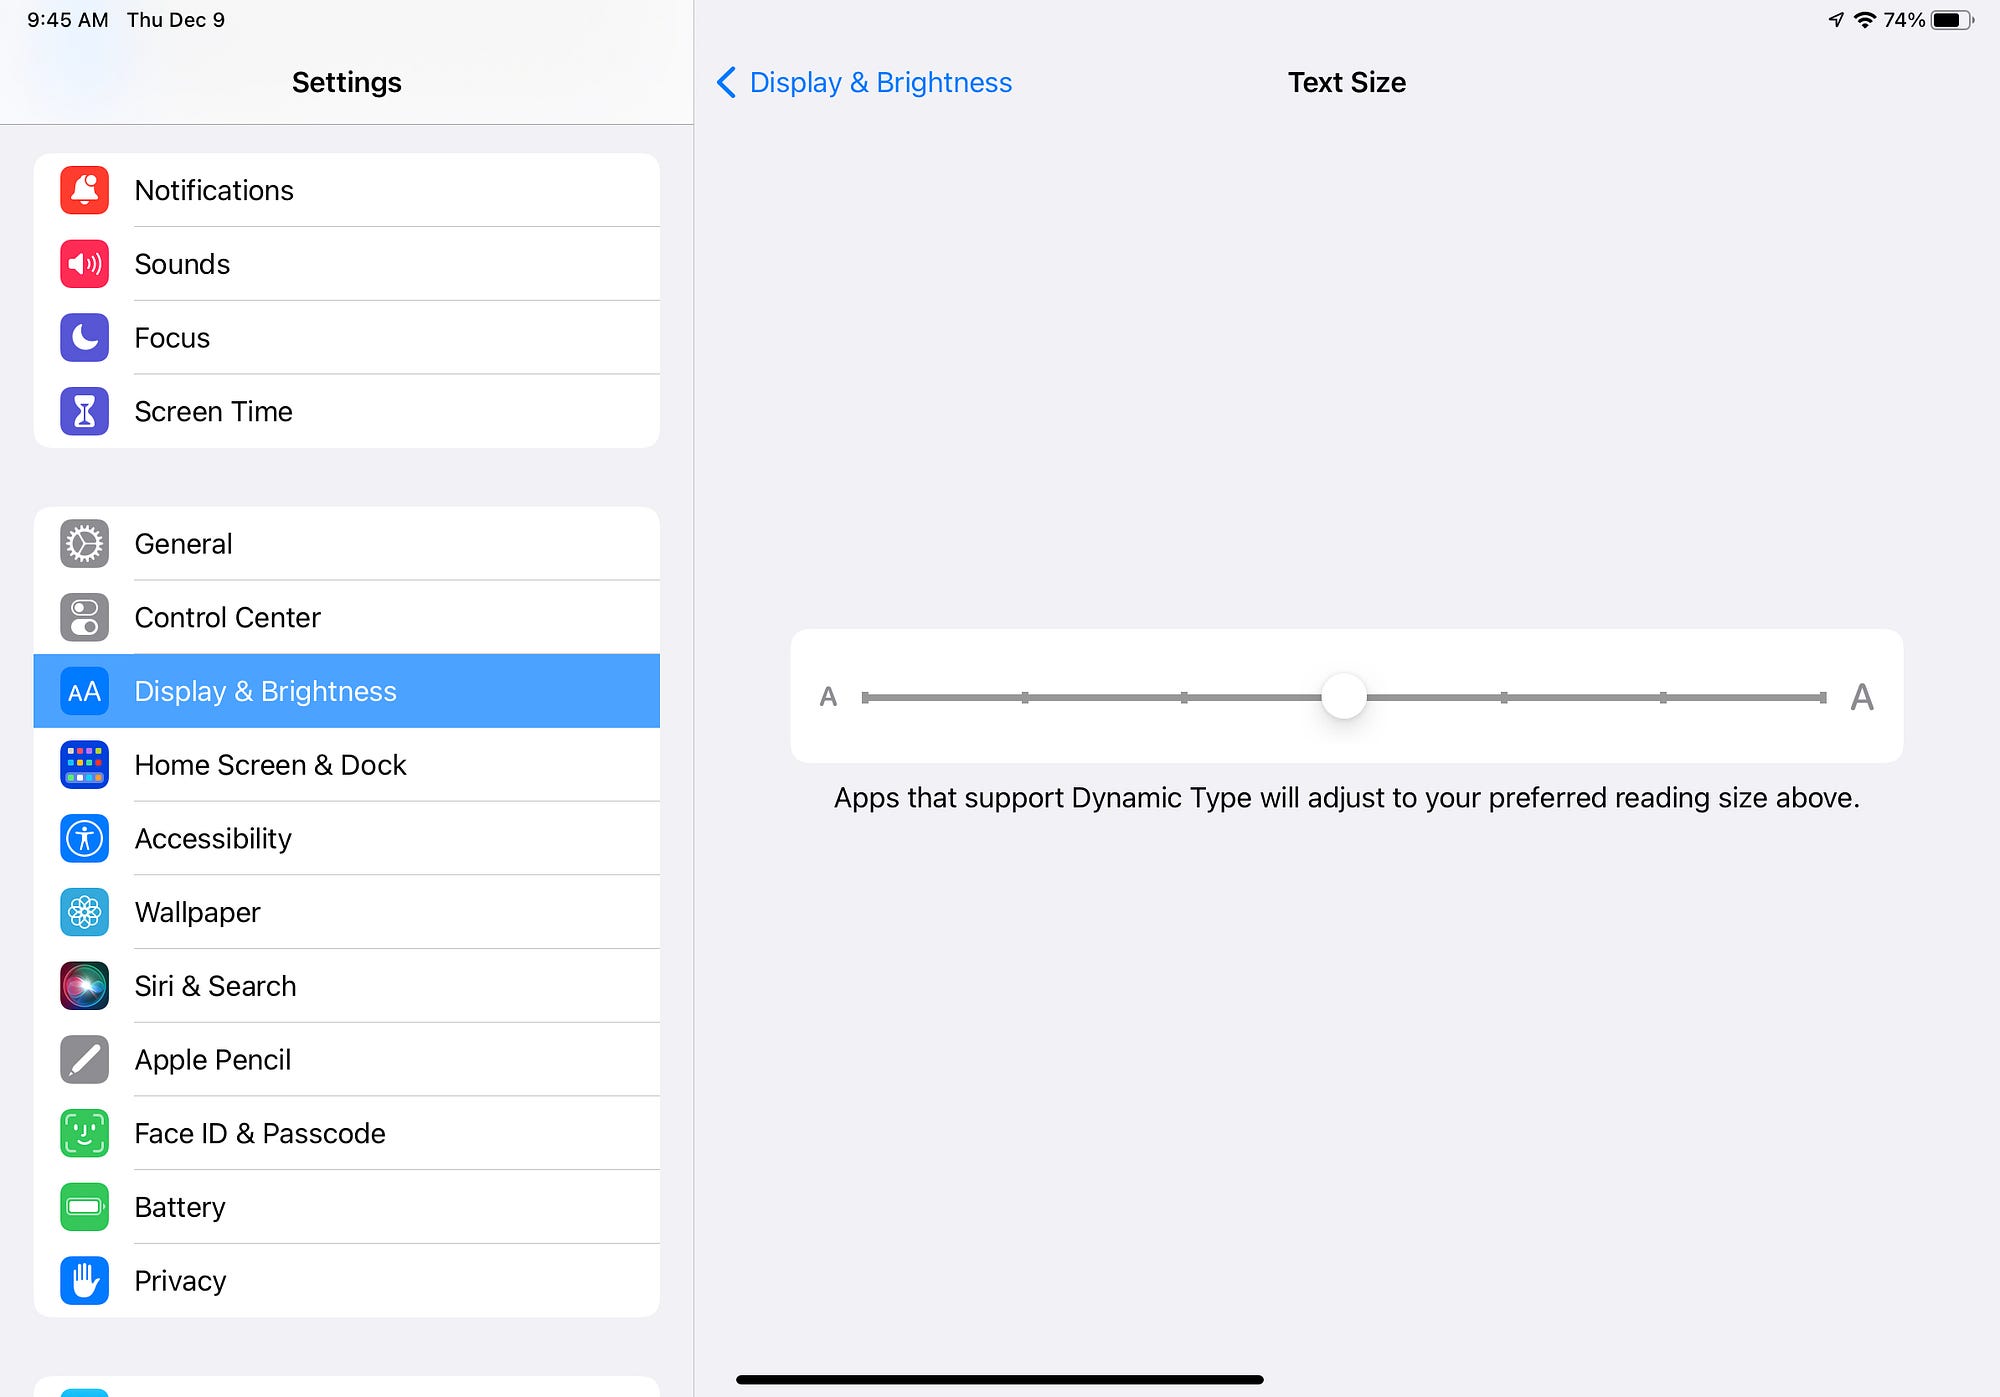
When I worked at an Apple retail store for a few years after retiring, I’d often see customers adjust text size using settings for Display and Brightness as shown in the screenshot here. Almost everyone knew how to do that; very few knew that there are more and often better built-in tools. This is true for Apple computers, iPhone and iPad, Apple Watch, and even Apple TV; I will cover all of those here.
On macOS
I’ll start here because that’s the easy one. Mac System Preferences has an Accessibility section that does offer Zoom.
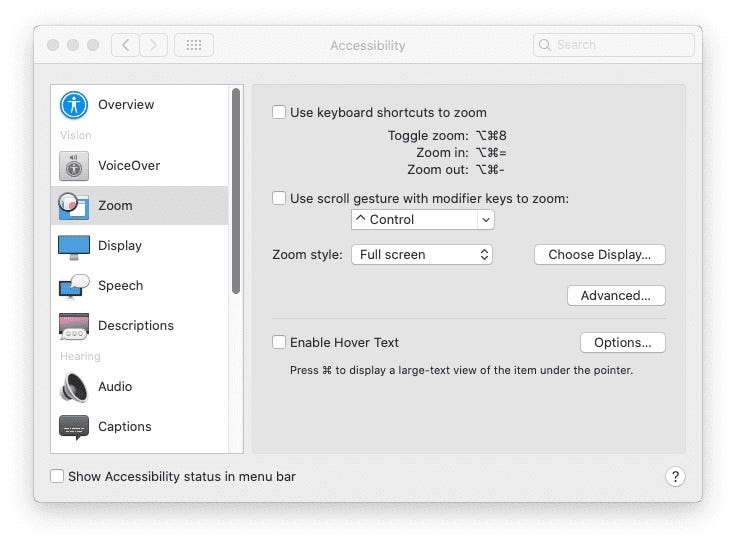
I don’t use it. While it does offer good control and the ability to have full screen zoom, a floating window zoom, and split screen zoom, that’s overkill for most of us. Without changing a thing in System Preferences, you already have the ability to zoom in and out: Holding Command and tapping “+” increases text size on your screen, Command and “-” decreases it and Command with “0” (zero) puts it back to defaults. That’s all I need for my seventy-something year old peepers.
Your needs may be different, of course. Also, what you don’t need now might be something you will need later in life, so it’s not a terrible waste of time to familiarize yourself with how those other settings work.
For IOS
Here’s where things get more interesting and where I do change settings to help my eyes on my iPhone and iPad.
One digression: if you use a keyboard with your iPad, the same Command “+”, Command “-”, and Command “0” work just as they do on a Mac. Other keyboard shortcuts also work, though not all. Those keys will NOT work from your Mac to increase the size of a Sidecar attached iPad, but the Mac Accessibility Zoom controls will affect a Sidecar display.
As I mentioned above, most people know how to adjust text size on their iPhone or iPad by using Settings->Display and Brightness. Most also know that they can use a pinch-out gesture in Photos and a few other places.
While increasing the text size and pinching out photos is useful. it doesn’t help with everything. For other things we need some help seeing, the IOS accessibility settings for Zoom give me what I need.
A simple three-finger tap zooms up either the whole screen or optionally will bring up a sliding window that magnifies whatever is under it. Three-finger tap again to revert to your normal size. Enabling that alone is a great improvement over changing the Display text size.
Some people prefer to set this over zooming the entire screen. If you do use that, I strongly suggest that you also turn on “Show Controller”. The controller lets you easily move to what you want to see and adjust the amount of magnification. Without it, Full Screen Zoom can be quite confusing. Google for “Zoom in on the iPad screen — Apple Support” (or “iPad screen”) to find Apple’s instructions.
On iPad, you can also use “Pinned Zoom” to force the zoomed region to the top, bottom, left, or right of the display.
I prefer that the Zoom Region is set to Window Zoom. Whichever you decide to try first, be sure to bump up the Maximum Zoom Level to a noticeable amount. You will be able to adjust this on the fly, but I suggest starting at a setting of at least 2–3x.
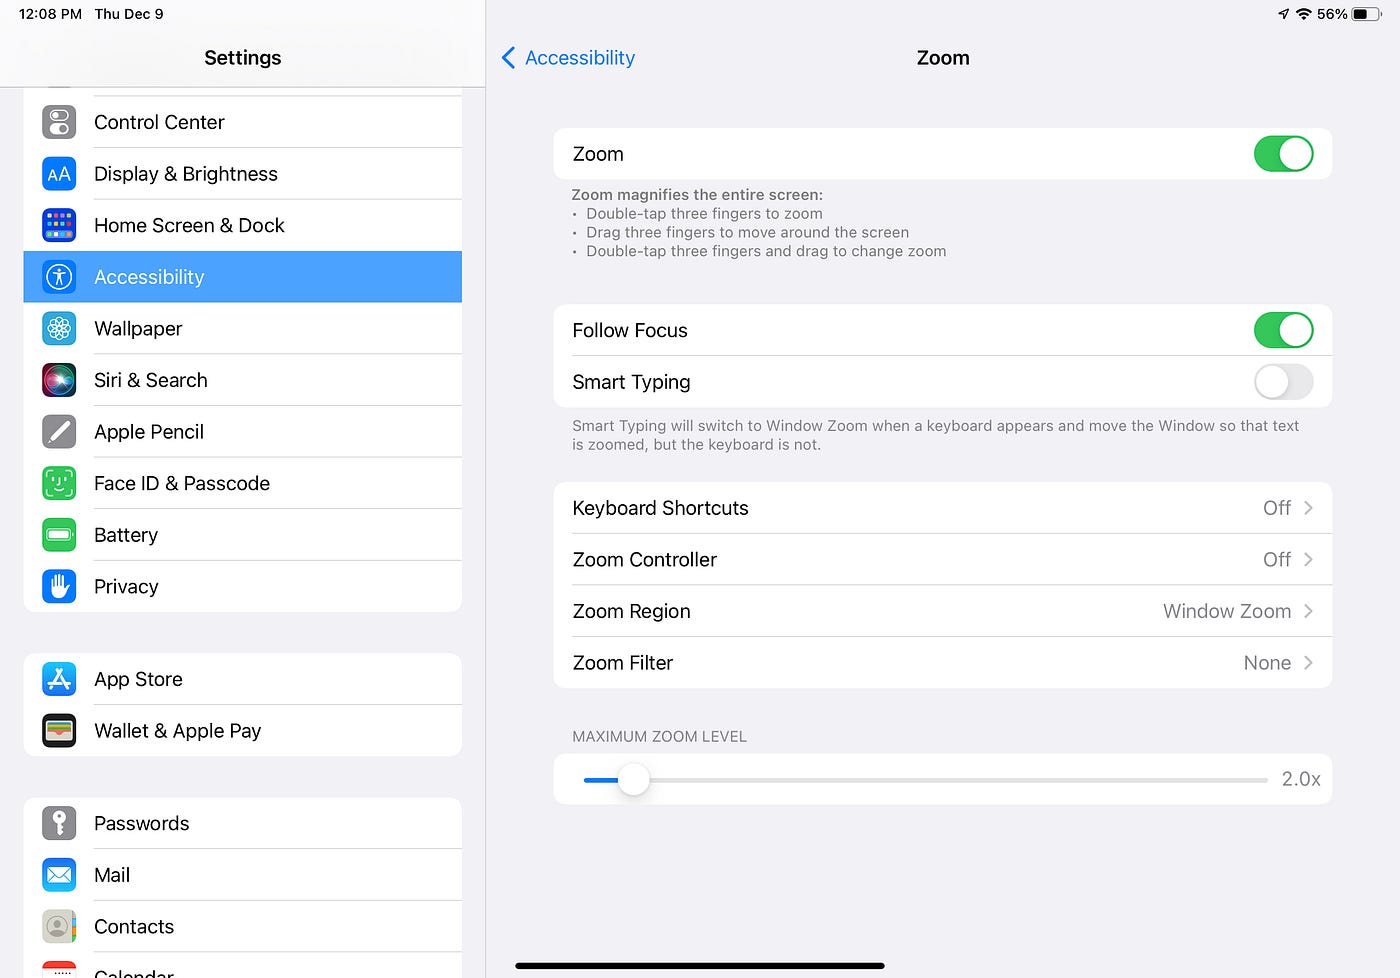
If you turn on Follow Focus, the zoomed view will follow your cursor insertion point. But when you do not have an insertion point and use Full Screen (in Settings or Photos for example), you can only stab futilely at the screen until you use the three finger tap again to get out.
Smart Typing will let you use Full Screen Zoom if you prefer that, but will automatically switch to Window Zoom if you switch to an app that calls up the keyboard. I think this is confusing, but some folks like it.
While in Window zoom, the little tab I’ve circled here in red offers two functions.
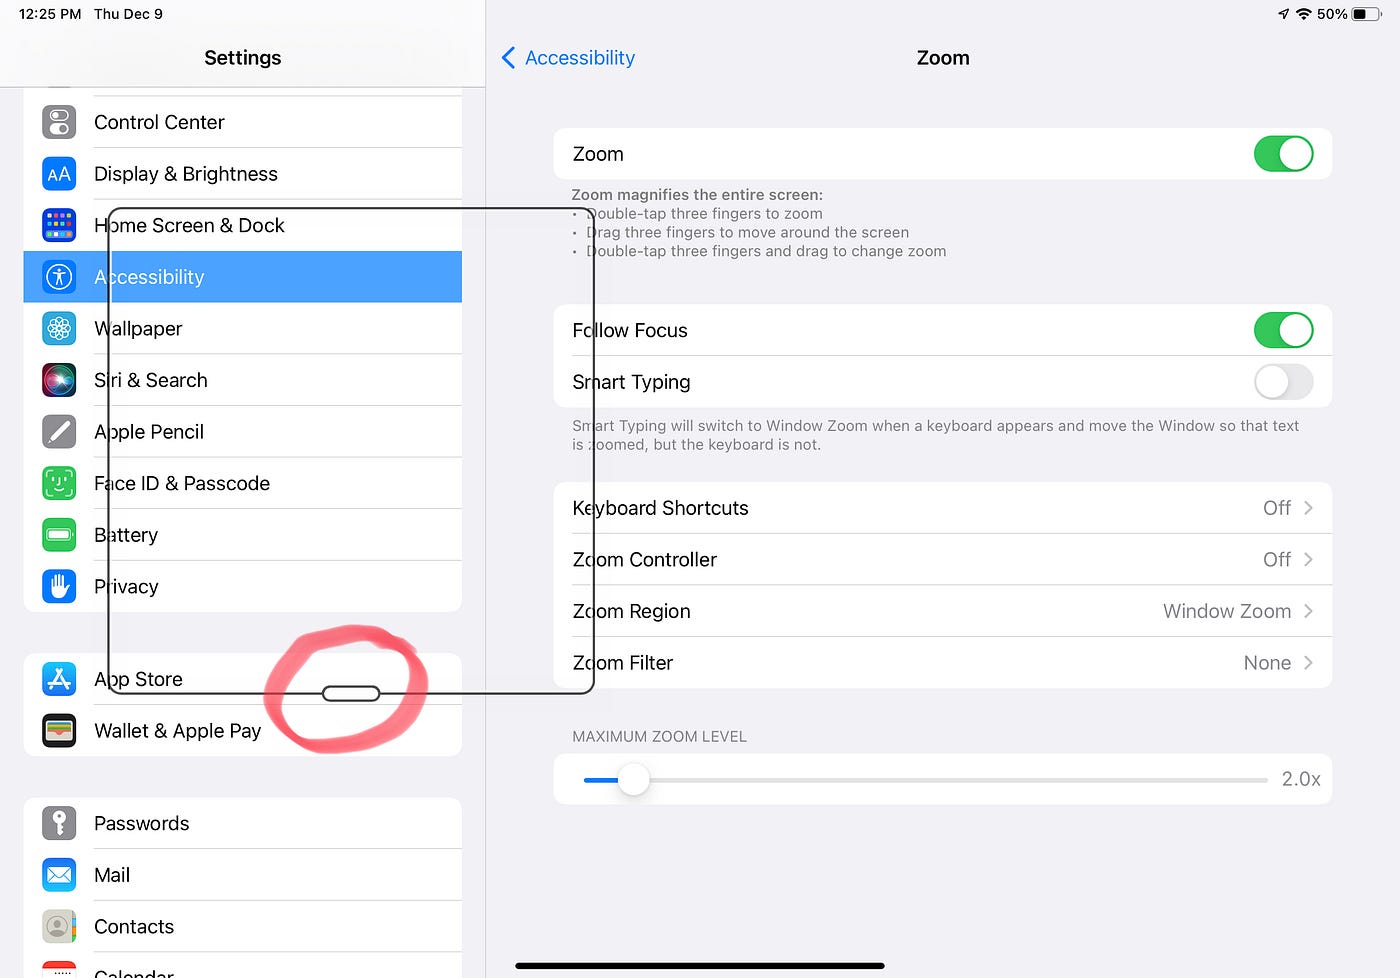
First, pressing and holding there lets you move your magnified window from place to place. Tapping it brings up more abilities.
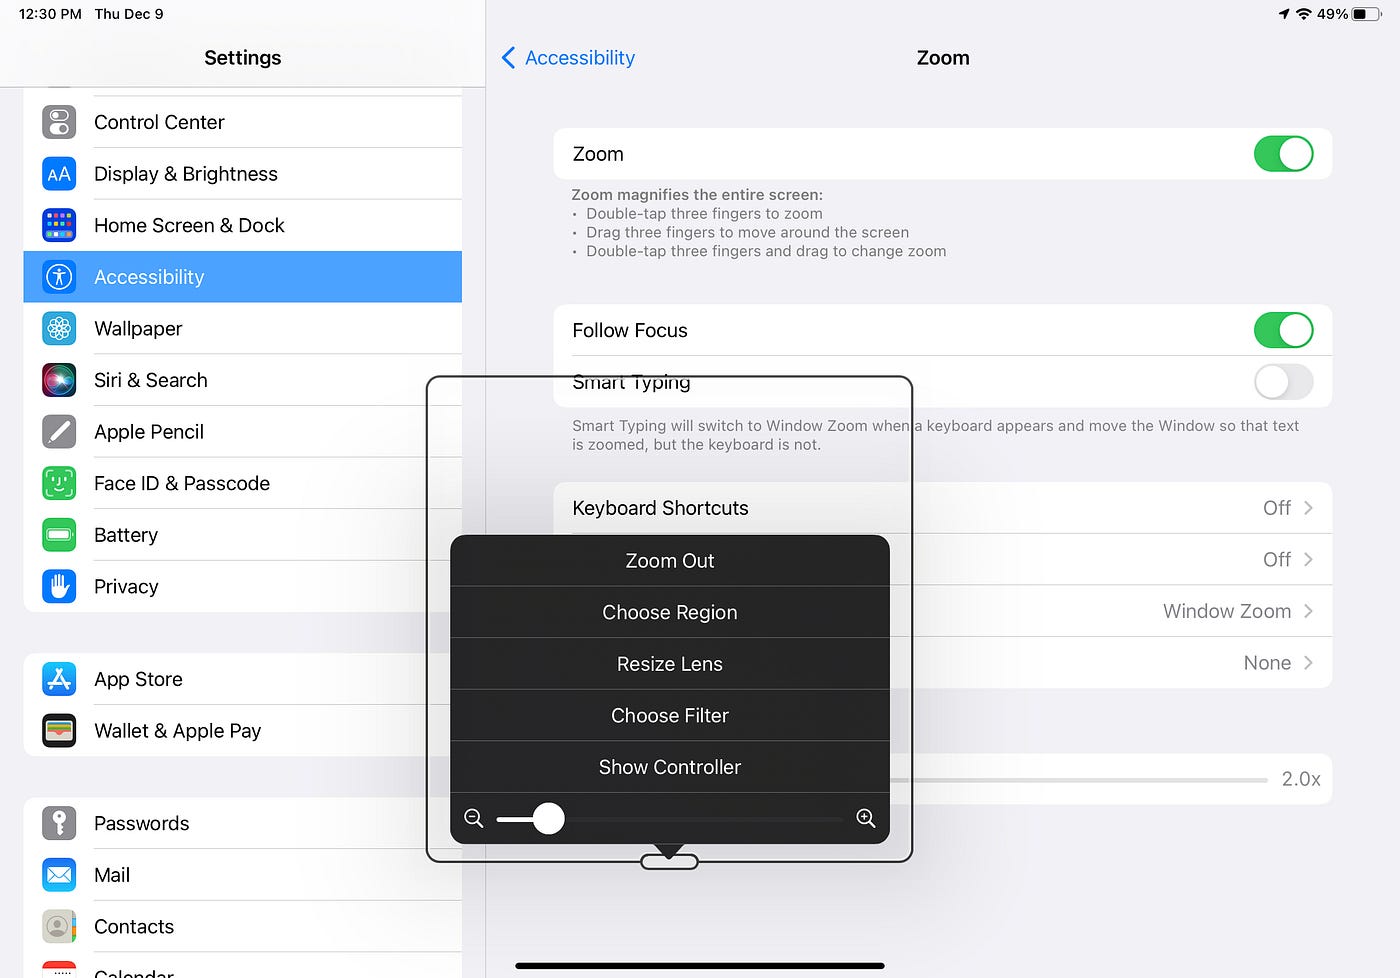
That little slider at the very bottom changes how much you zoom. That is limited by how you set Maximum Zoom Level, so be sure that is high enough to meet all your needs.
“Zoom out” takes you out of Zoom without needing to use the three finger tap.
“Choose Region” lets you switch between Full Screen and Window (plus Pinned on iPad).
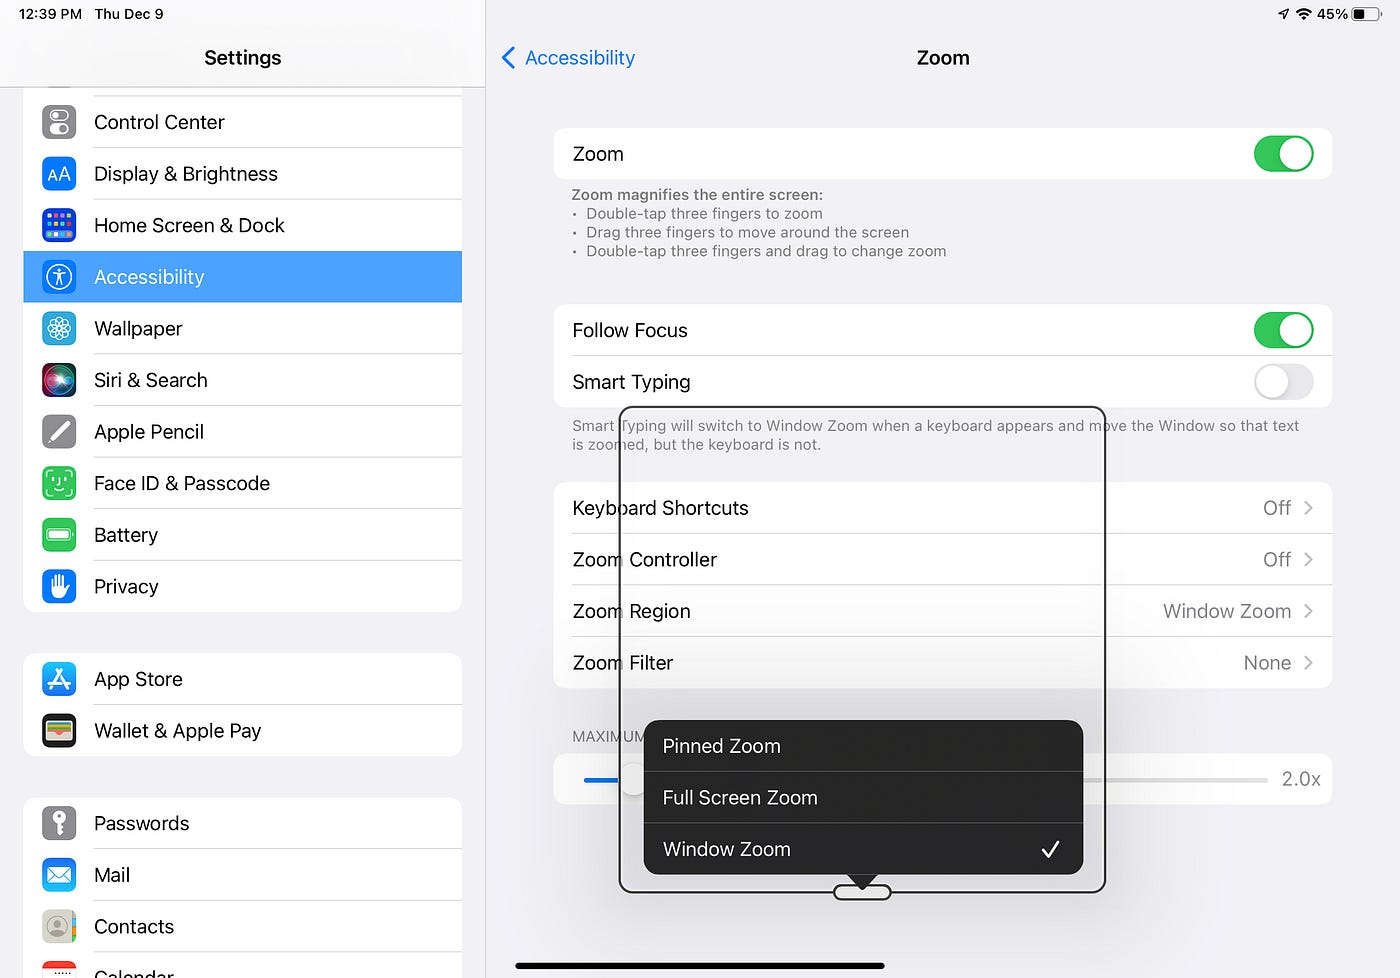
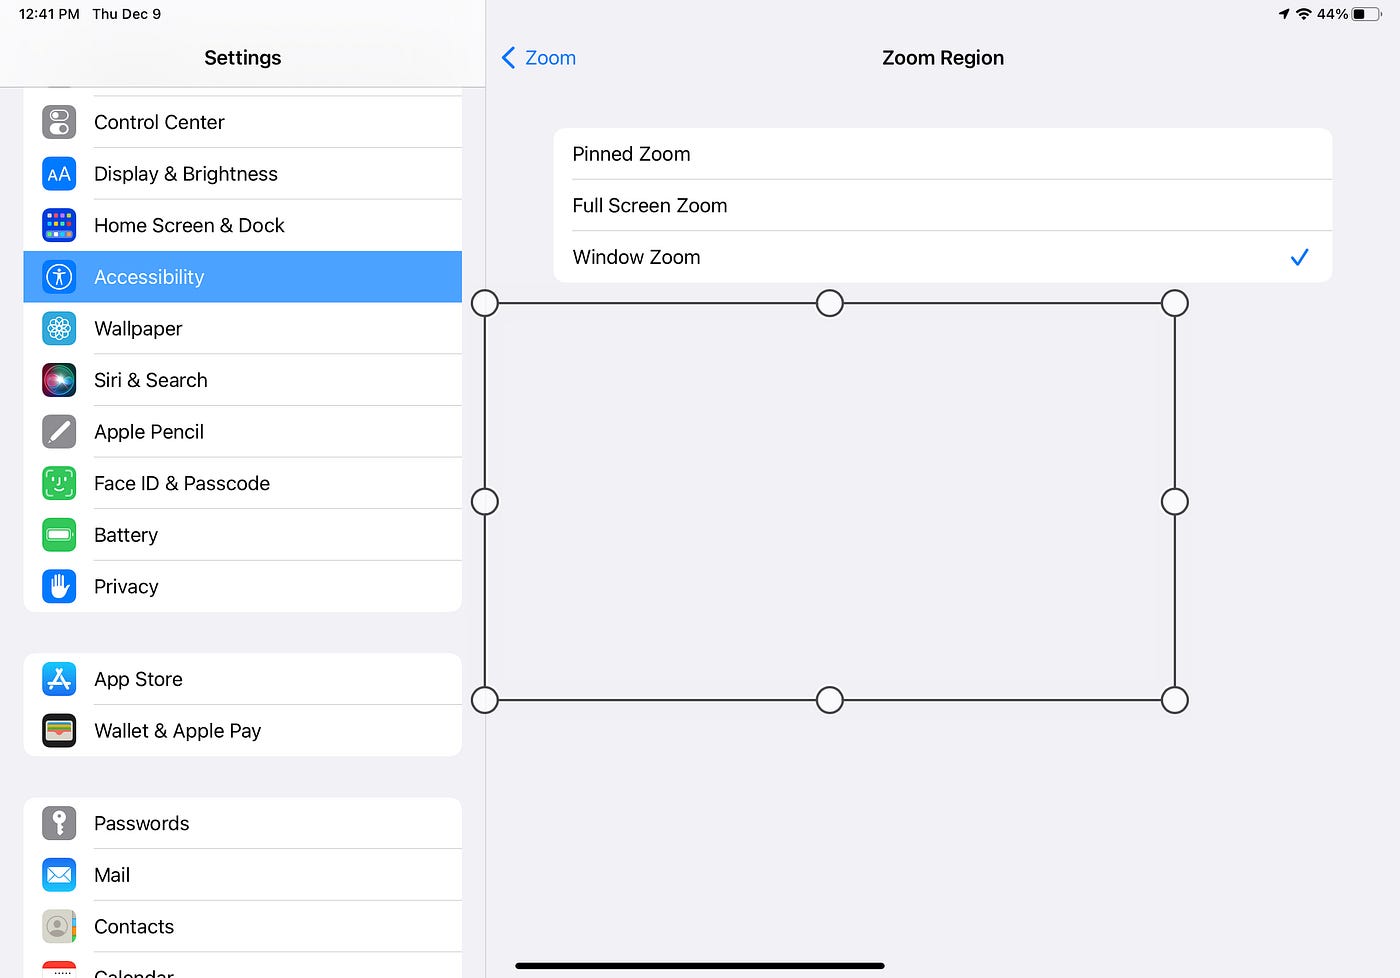
“Resize lens” changes the size of your magnified view by giving you drag bubbles to grow or shrink each dimension.
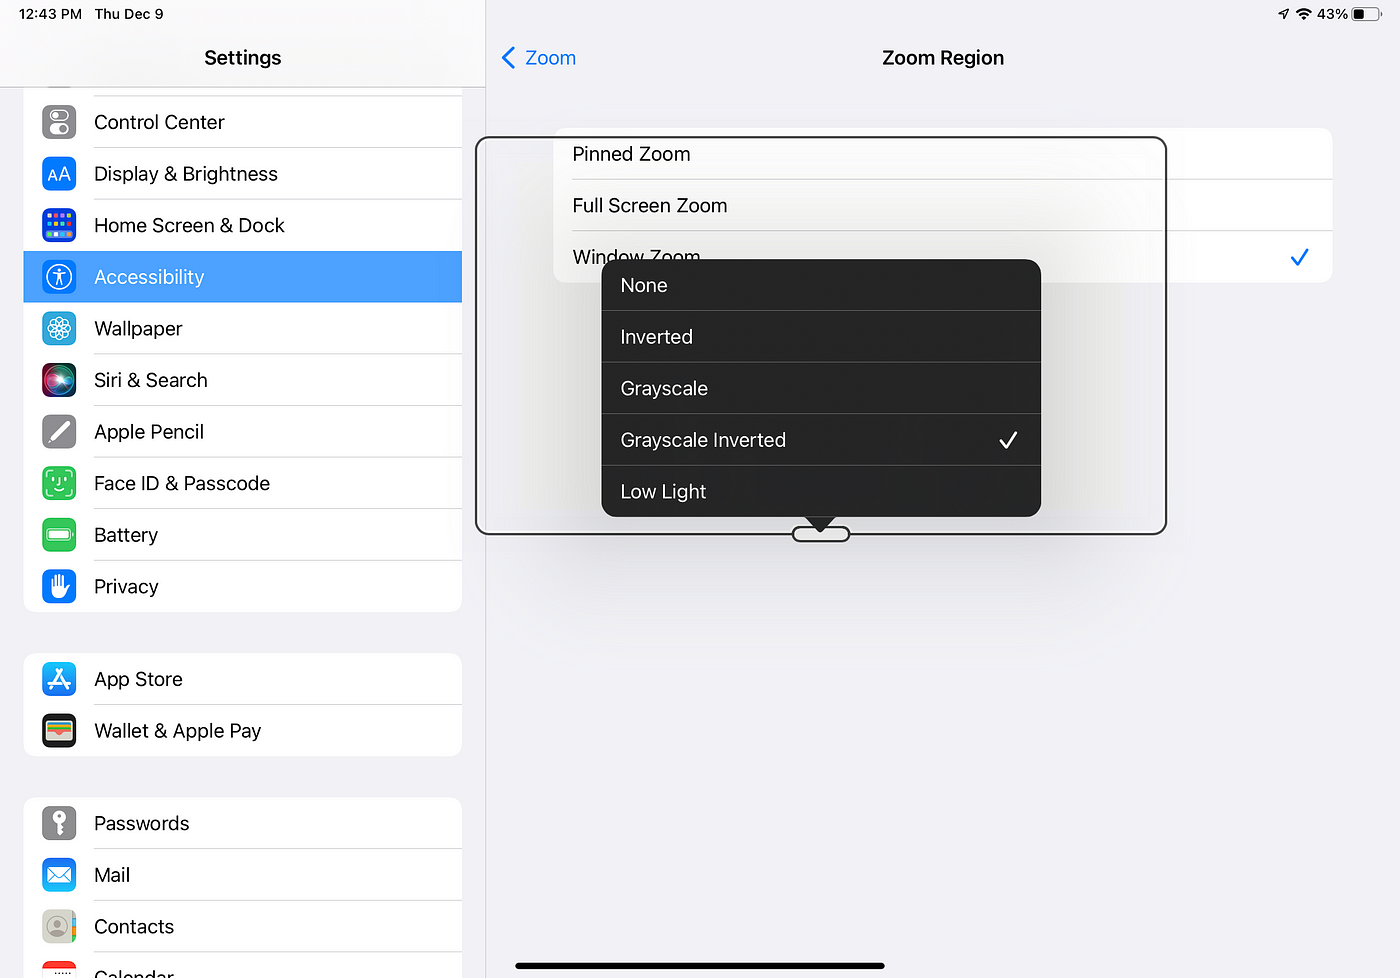
Finally, “Choose Filter” sets the view background.
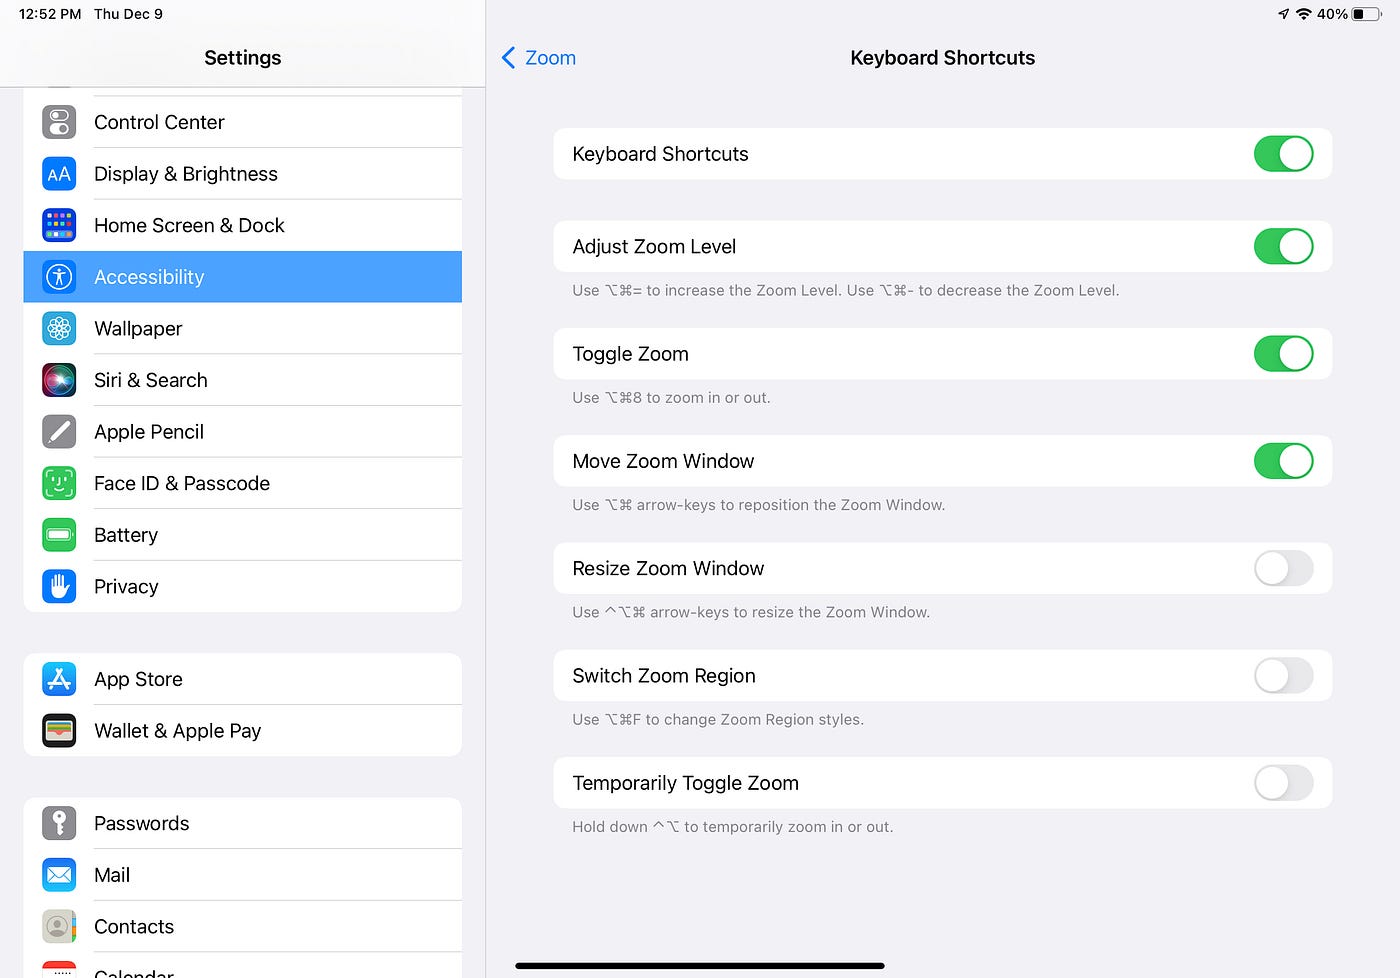
Back out at the main screen, “Keyboard Shortcuts” is only useful if you have an attached keyboard.
Reader View
With or without magnification, Safari’s Reader View can be very helpful. In fact, when a website uses fonts that are too small, Reader View provides an instant fix. On Mac, that’s in the Safari View menu, but also works by Shift-Command-R. On IOS, click on the Aa at the top of the screen.
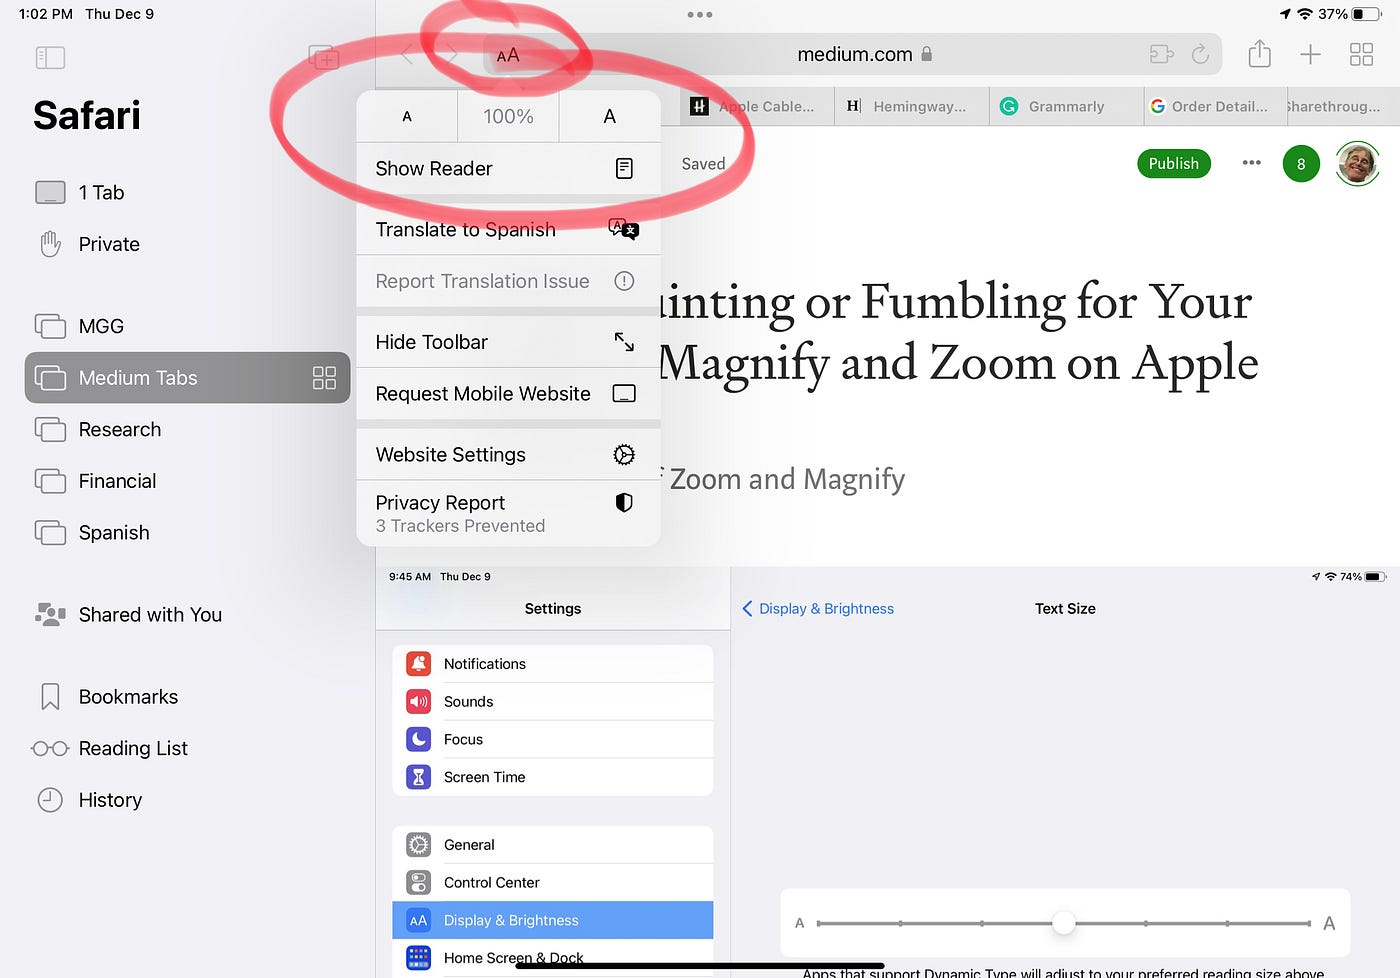
Reader View will not work with all websites, but it usually will. In addition to giving you a standard sized font, it also strips out ads and other things unrelated to the article. Whenever I want to print a webpage, I apply Reader View if I can.
WatchOS
Just like the iPhone, you can change the text size in Watch Settings->General->Display and Brightness but this won’t affect all apps and the small size of the watch face can only fit so much on the screen. Making the text size larger means even less can fit.
Turning on Zoom in the Watch App Accessibility section is a better choice, but deciding how much to zoom is tricky.
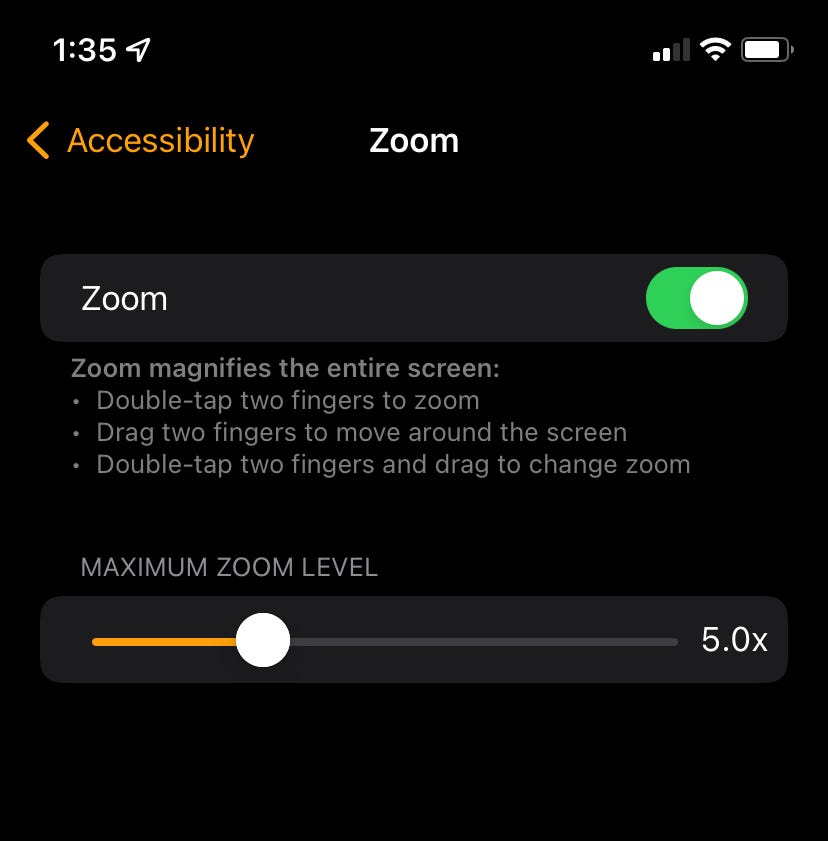
If you set it too high, most everything will be off screen, but if too low, it may not be enough.
On the other hand, setting higher is better because you can change this on the fly. Double-tap with two fingers but do not lift your fingers on the second tap. Just slide upward to increase magnification or down to lessen it. This is a clumsy movement and is hard for most folks to master. Be patient, it does work.
Double-tap with two fingers again to go back to the normal size face. Whatever magnification you are at when you revert to normal will be remembered and that’s what you’ll get when you ask for increased size again. This is also a source of confusion because you can easily adjust the size so small that there is no magnification at all and think that your two finger double tap isn’t working.
While magnified, you can rest two fingers on the screen and move them to see more of the screen.
Apple TV
This refers to the newer Apple TV hardware; I do not own an older model to test.
You probably won’t use it very often, but once in a while, you may want to hit that pause button and zoom in for a close look at some detail on the screen, so you might want to turn it on now.
As with everything else, turning Zoom on is found in Settings->Accessibility. That’s easy enough and you can set the maximum zoom there also. The same caveats apply here as did for Apple Watch: don’t set it too low or too high.
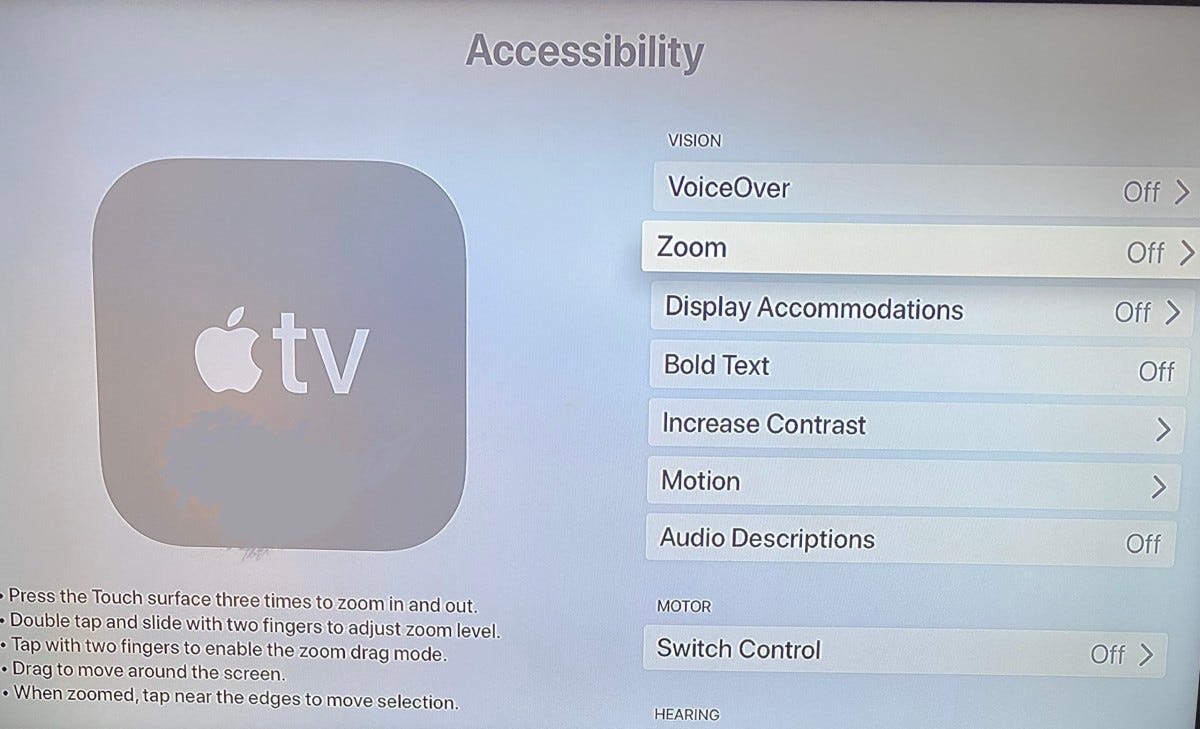
To turn on Zoom, the instructions should say “click” three times rather than “press”. I also needed to change the Touch Surface Tracking speed under Remotes and Devices on the older brown remote . On the newer silver colored remote (the one with the power button), I didn’t need to do that.
The instructions tell you to double-tap with two fingers on your remote‘s click pad and drag up or down to adjust zoom. What they do not tell you is that you need to double-tap and, without lifting your fingers, drag up down to change the zoom level. That’s the same as Apple Watch.
Moving around when zoomed is easy enough once you get the hang of it. After zooming, switch to one finger to move around by dragging on the remote touch surface or track wheel on the new silver remote.
Magnifying External Objects
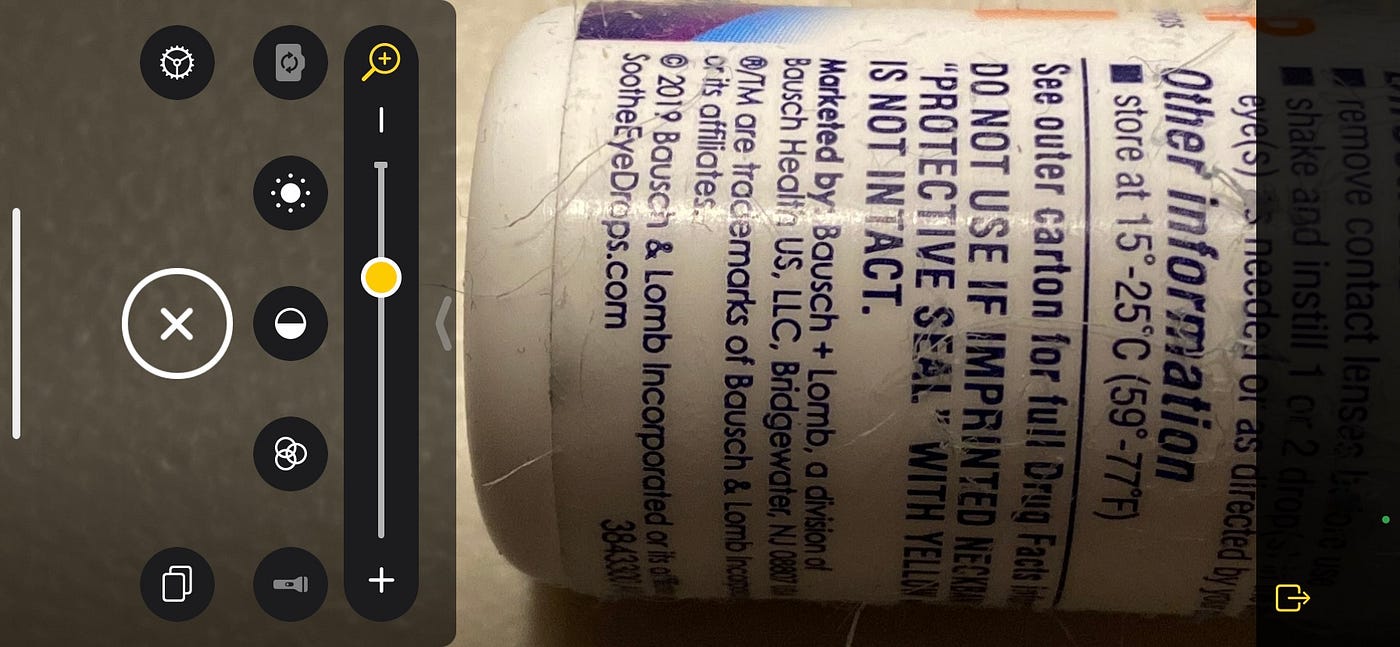
Any device with a camera can help with the rest of our world. Snap a picture and use pinch gestures or Zoom to get a closer look.
Apple also has an app called Magnifier that can skip the photography part. It has controls for front and back view, brightness and contrast, a flashlight, filter, and even the ability to take a temporary picture that isn’t automatically saved to your camera roll, but can be.
In some ways, for some people, this can be a simplified Camera app. If you find the normal Camera confusing, this just might be better. Google “Use Magnifier with your iPhone or iPad” to find out more.
- You might think that writing here means big money. Actually, it usually gets me only a dollar or so a day. That is why donations, one time or monthly, are always appreciated. See https://ko-fi.com/pcunix
Comments
Post a Comment